Apple ProRaw is one of the biggest new camera features on the iPhone 12 Pro and iPhone 12 Pro Max – and with the Christmas holidays serving up plenty of tinkering time, we've put together this guide to help you do just that.
What is Apple ProRaw? In short, it's halfway house between compressed JPEGs and uncompressed raw files, which means it gives you the benefits of iPhone's computational trickery in a file with huge editing flexibility. In certain situations, it has the potential to seriously elevate your photography.
If you want a more in-depth explanation of the format itself, check out our 'What is Apple ProRaw?' explainer. But in this guide we'll be focusing on three main practical questions – how to turn on Apple ProRaw, when you should use it, and how to edit ProRaw files in both Apple's Photos app and third-party ones like Lightroom.
As we'll see, the main thing to bear in mind is that Apple ProRaw isn't a golden bullet for better photos in all situations. There are pros and cons to using it, which you can jump to below, but its real benefits can be seen in challenging conditions – think indoor situations, strange or artificial lighting, and shorter days where the sun is low in the sky and creates a high-contrast scene.
All of those can create a pretty challenging set of conditions for the average smartphone to tackle. But Apple's new highly-editable format can help you overcome some tricky photographic scenarios, even after you’ve taken the shot. In many ways, it's also a lot more approachable than standard raw files, too.
Luckily, ProRaw is simply a new version of the “digital negative” (DNG) format, which means you can not only edit it in-camera, but also use third-party apps like Photoshop and Lightroom. Like raw files, ProRaw shots have a lot more information than JPEGs or HEIC files, which means you can claw back lost detail, tackle problems with exposure or lighting conditions, and more.
In this guide, we'll show you how to do exactly that – but first, here's how to turn on Apple ProRaw on your iPhone 12 Pro or iPhone 12 Pro Max...
- Read our in-depth Apple iPhone 12 Pro review
How to turn on Apple ProRaw
Apple ProRaw is available to anyone who has an iPhone 12 Pro or iPhone 12 Pro Max that's running iOS 14.3 or later. Right now, the format is only available on those two phones, even if you have an older iPhone with iOS 14.3.
To update you're firmware, just go to Settings > General > Software update. Once that's done, you’ll need to enable raw shooting from the iPhone’s main menu. Head to Settings > Camera > Formats and flick the “Apple ProRaw” slider to on.
You’ll notice here that there’s a warning about file sizes, which is worth bearing in mind. Each ProRaw file will take up roughly 25MB of space on your iPhone, which will quickly mount up if you use it for each shot. That means it's best to use it sparingly, or in situations where it might be most helpful.
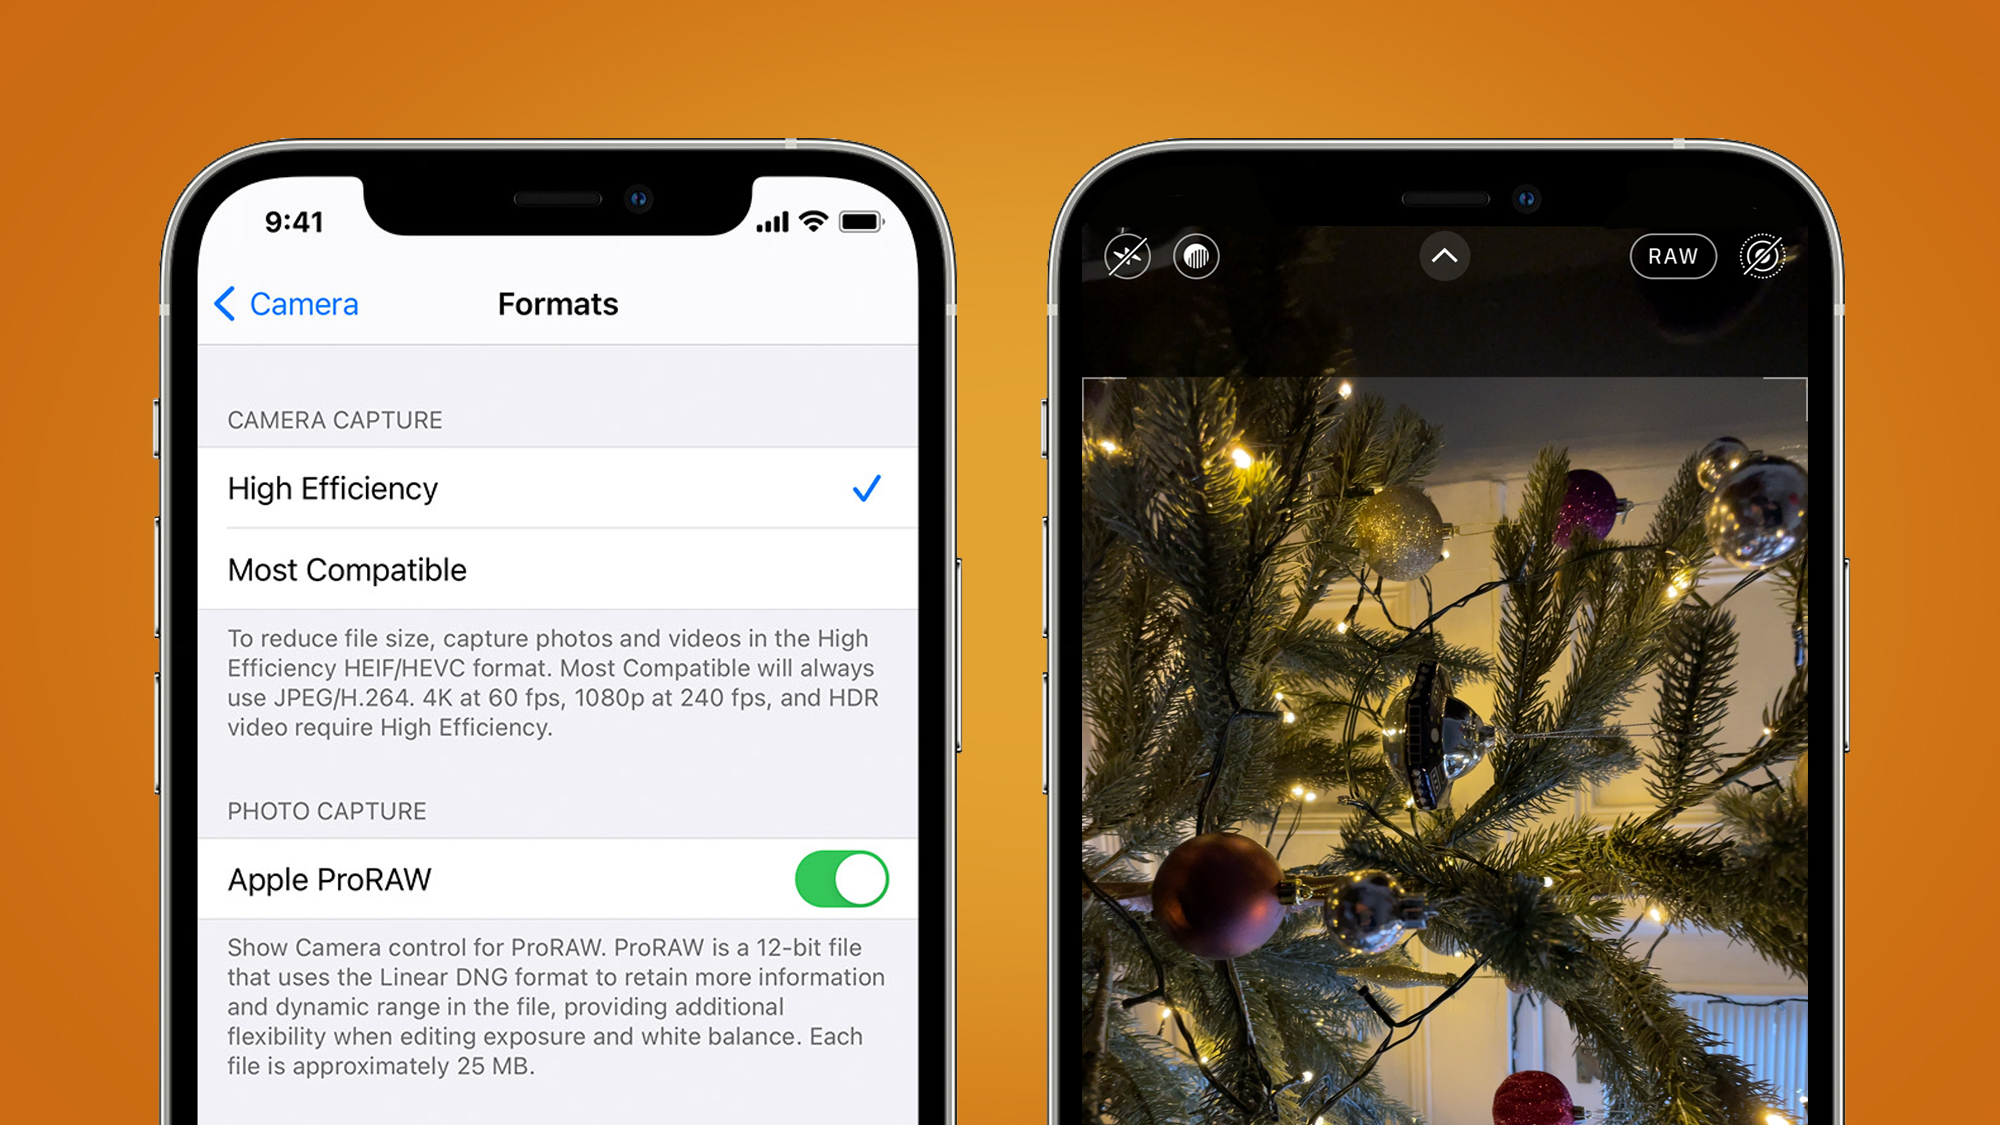
The next time you start up the iPhone’s native camera app, you’ll notice that there’s now a “RAW” icon in the top right-hand corner of the screen. By default, this will have a line through it to indicate that it’s not activated. Tapping it will remove the line and you’ll now be shooting in ProRaw.
Before you do this, there is one other thing to bear in mind – Apple's Camera app does not shoot a JPEG or HEIC image simultaneously with ProRaw, so you’ll want to be sure that you really want to shoot in the format before using it. If that's a feature you need, third party apps like Halide allow you to shoot a ProRaw + JPEG at the same time.
Once you’ve shot your raw photo, it’s worth switching ProRaw back off again if you intend to carry on shooting other scenes.
How to shoot and edit Apple ProRaw photos
1. Choose the right scene
Because each ProRAW file is large and not as easy to share as JPEG / HEIC files, it’s really worth considering which scenes are worth shooting in the format, and which aren’t.
Everyday snaps of your lunch aren’t worth the extra storage or hassle – and it won't give you huge benefits for the average landscape shot in bright and sunny conditions, either. The exception there is if the winter sun is bright and low in the sky, causing a high-contrast effect.
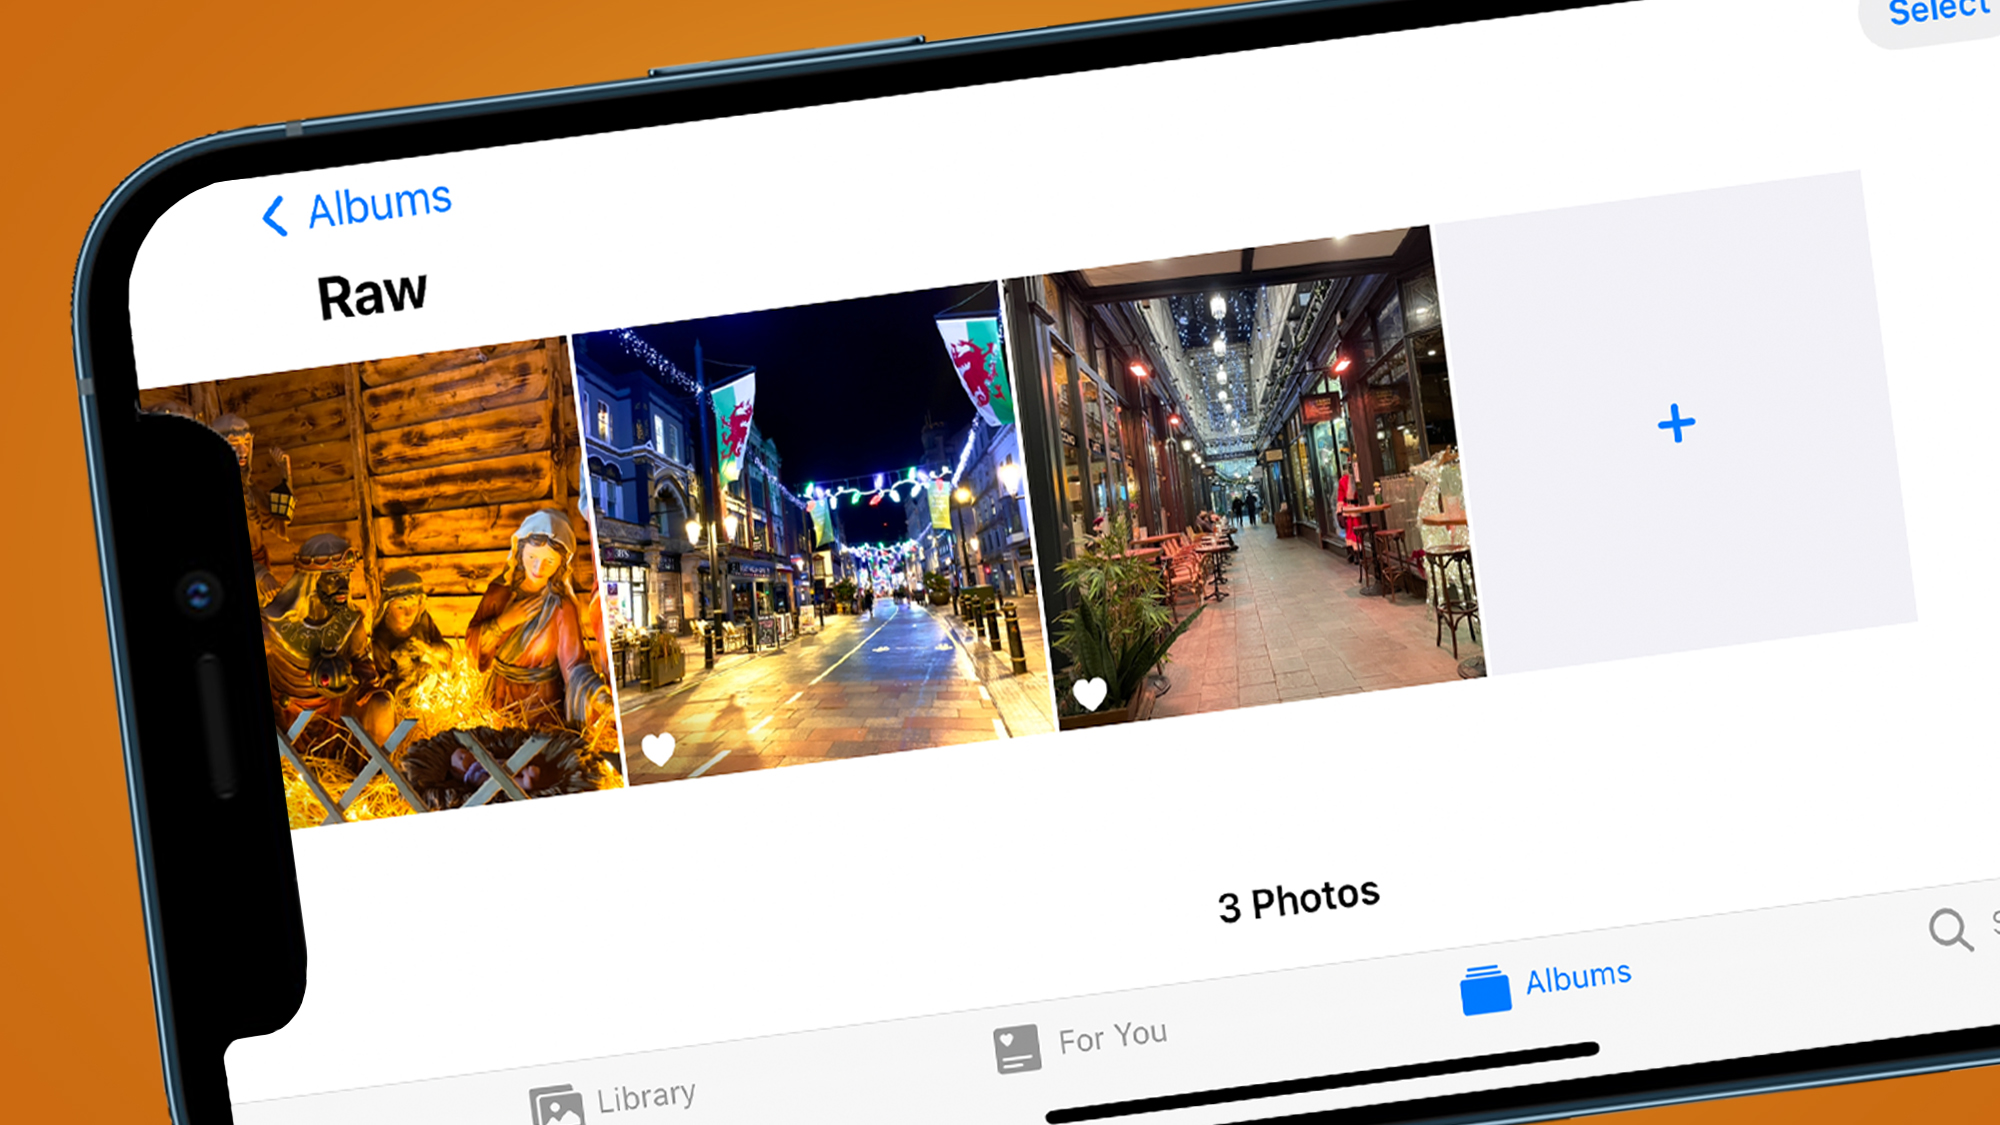
Low light, especially when there is artificial sources of light in the scene, is the ideal situation to shoot with ProRaw, as you’ll have greater scope to edit the shot to your own preferences later.
Above are a few different scenes that would arguably benefit from being shot in ProRaw. Light is either low or mixed and they’re generally lacking a little oomph. But for the purposes of this piece we’ll pick just one to concentrate on - which, as it’s the season, will be the artificially lit Christmas scene.
2. Make subtle tweaks with the Photos app
The Photos app has a versatile set of editing options, ranging from fairly straightforward or subtle changes, right through to more advanced edits that sort out larger problems.
To get started, all you need to do is view your photo in the Photos app (or tap the gallery in the camera app). Once you’ve found it tap the word “Edit” in the top right-hand corner of the screen and you’ll be met with a variety of different editing options.
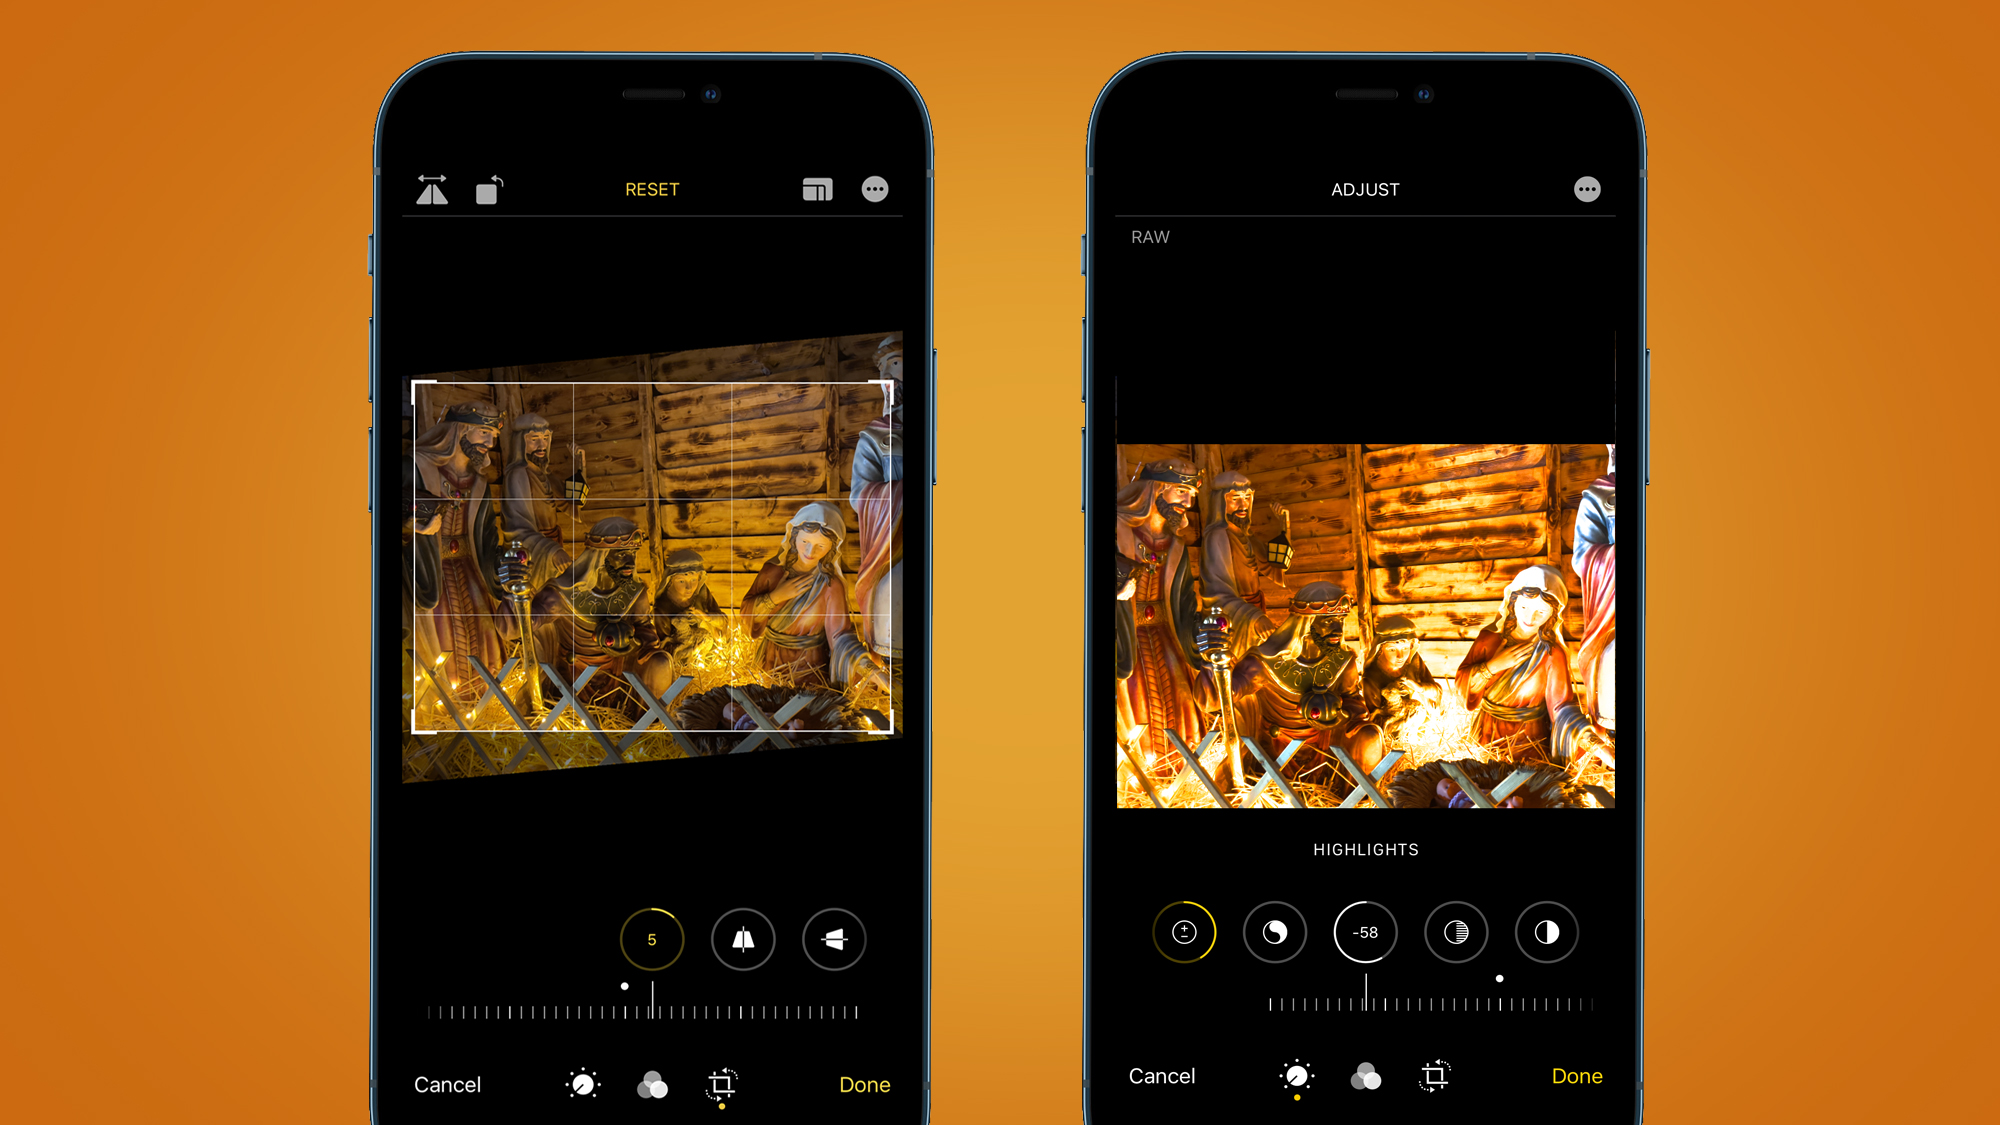
You’ll also find an “automatic” option, represented by a magic wand. Tapping this produces quick and instant results, which may not be perfect, but can be a good place to start. We prefer to start with simple edits such as straightening, cropping and rotating – once you’e got these sorted out, it tends to inform any larger changes you want to make.
At the bottom of the screen, you’ll see three different icons – to alter your composition, tap on the “crop” icon. Now, you’ll be able to rotate, straighten, alter perspective or even change the aspect ratio to whatever you’re happy with.
3. Now use the Photos App for bigger changes
Once you’re happy with the overall composition, you can dive into more serious edits. Tap the “dial” icon at the bottom of the screen to go back to the more bigger editing tools.
For a photo like this, there’s a number of edits we can make to improve it. We might start with Exposure to brighten it up a bit, then move on to Highlights to recover some of the lost detail in the brighter, blown out areas. We can use Shadows to bring back some detail in the darker areas, plus dial in some Contrast.
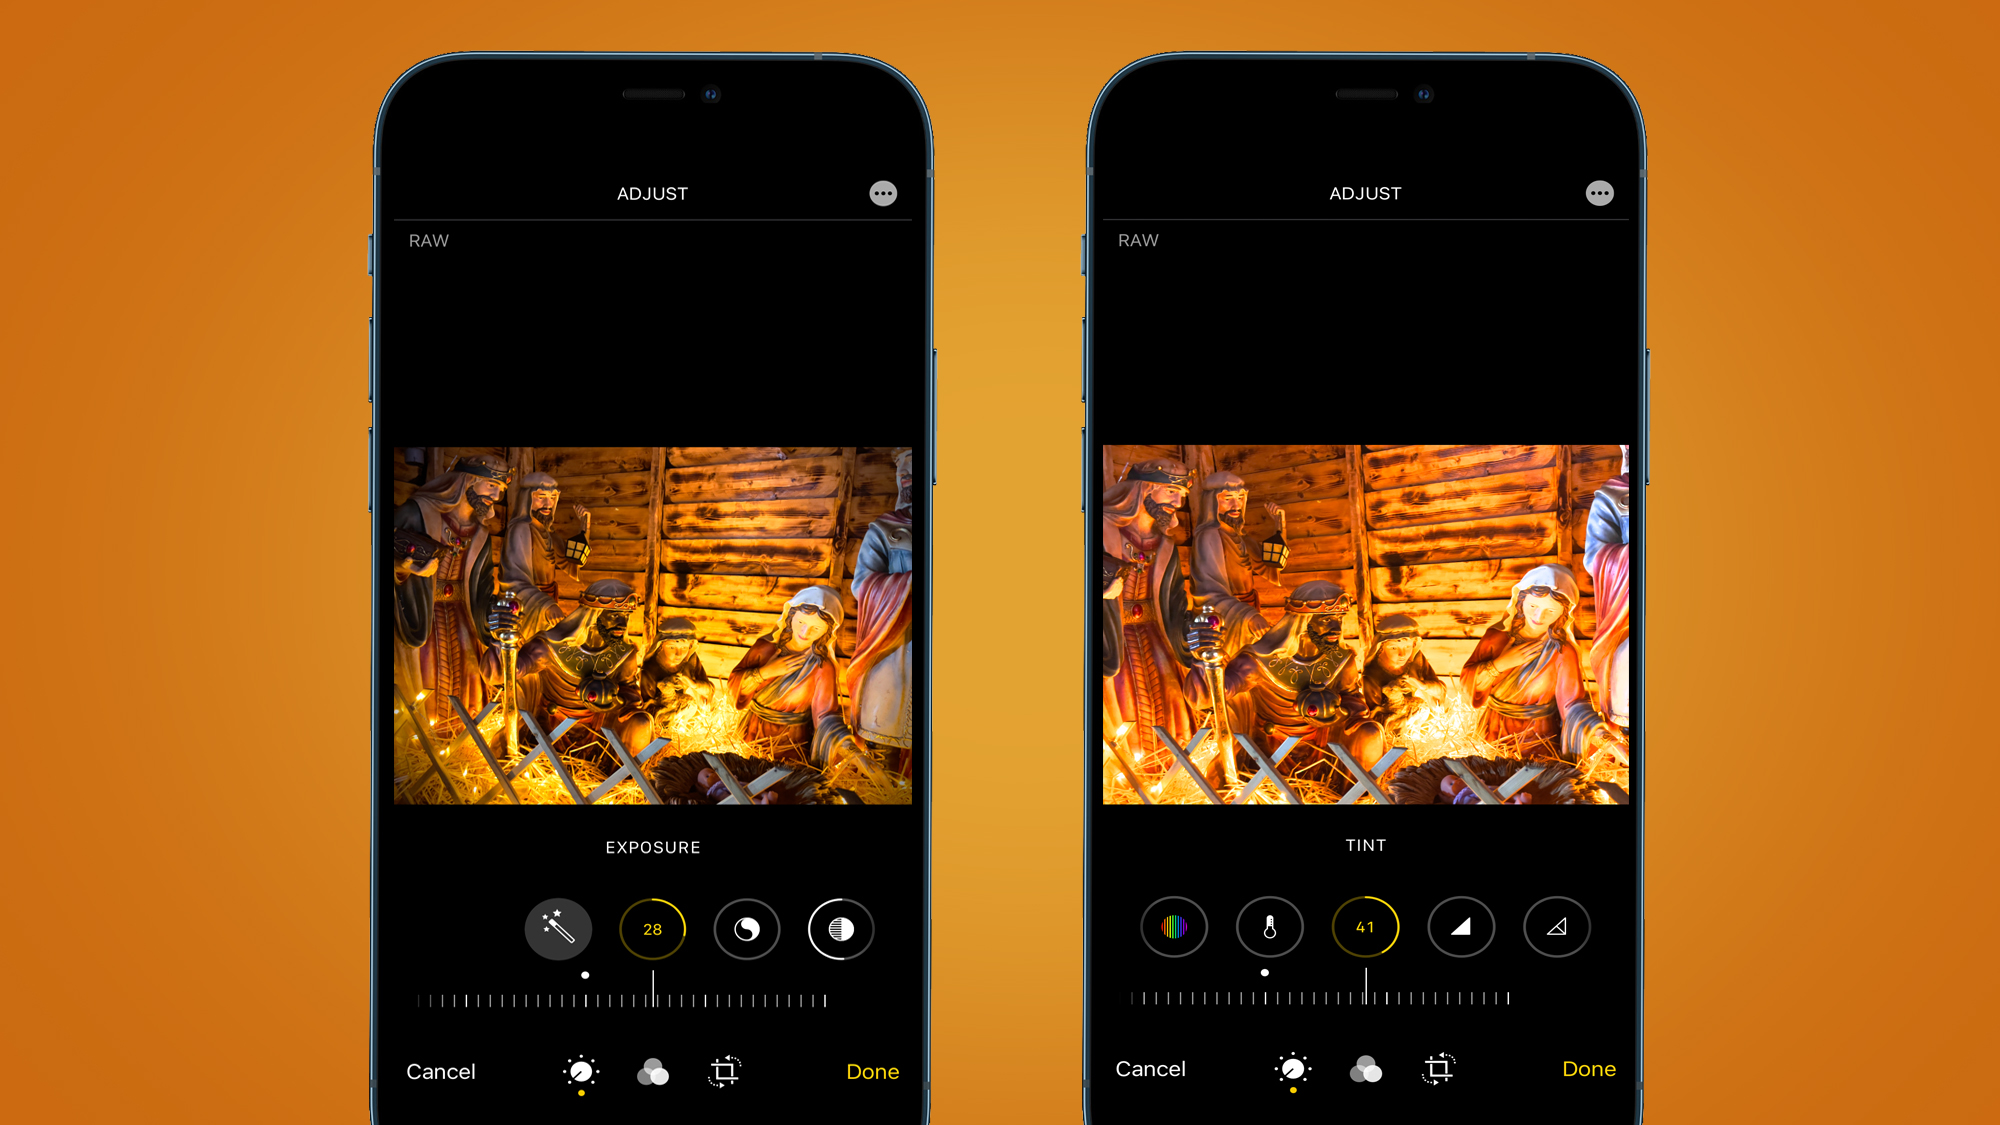
If you’re not happy with how the white balance has rendered the artificial lights, head to Warmth or Tint to make adjustments until it’s a bit closer to the original scene. You can also use Saturation to either make those colors pop, or reduce it a bit for a more realistic effect.
There are further settings, which are all worth sitting down and experimenting with so you have a full handle on each of them.
4. Make additional tweaks in Lightroom
As Apple ProRaw uses the open DNG format, it can be opened in third-party apps and software beyond Apple's Photos app. You can do that directly on the phone, or on your computer, depending on how you like to work.
Apple says that editing will be better from software that directly supports ProRaw, but that shouldn’t stop you using different programs if you prefer it.
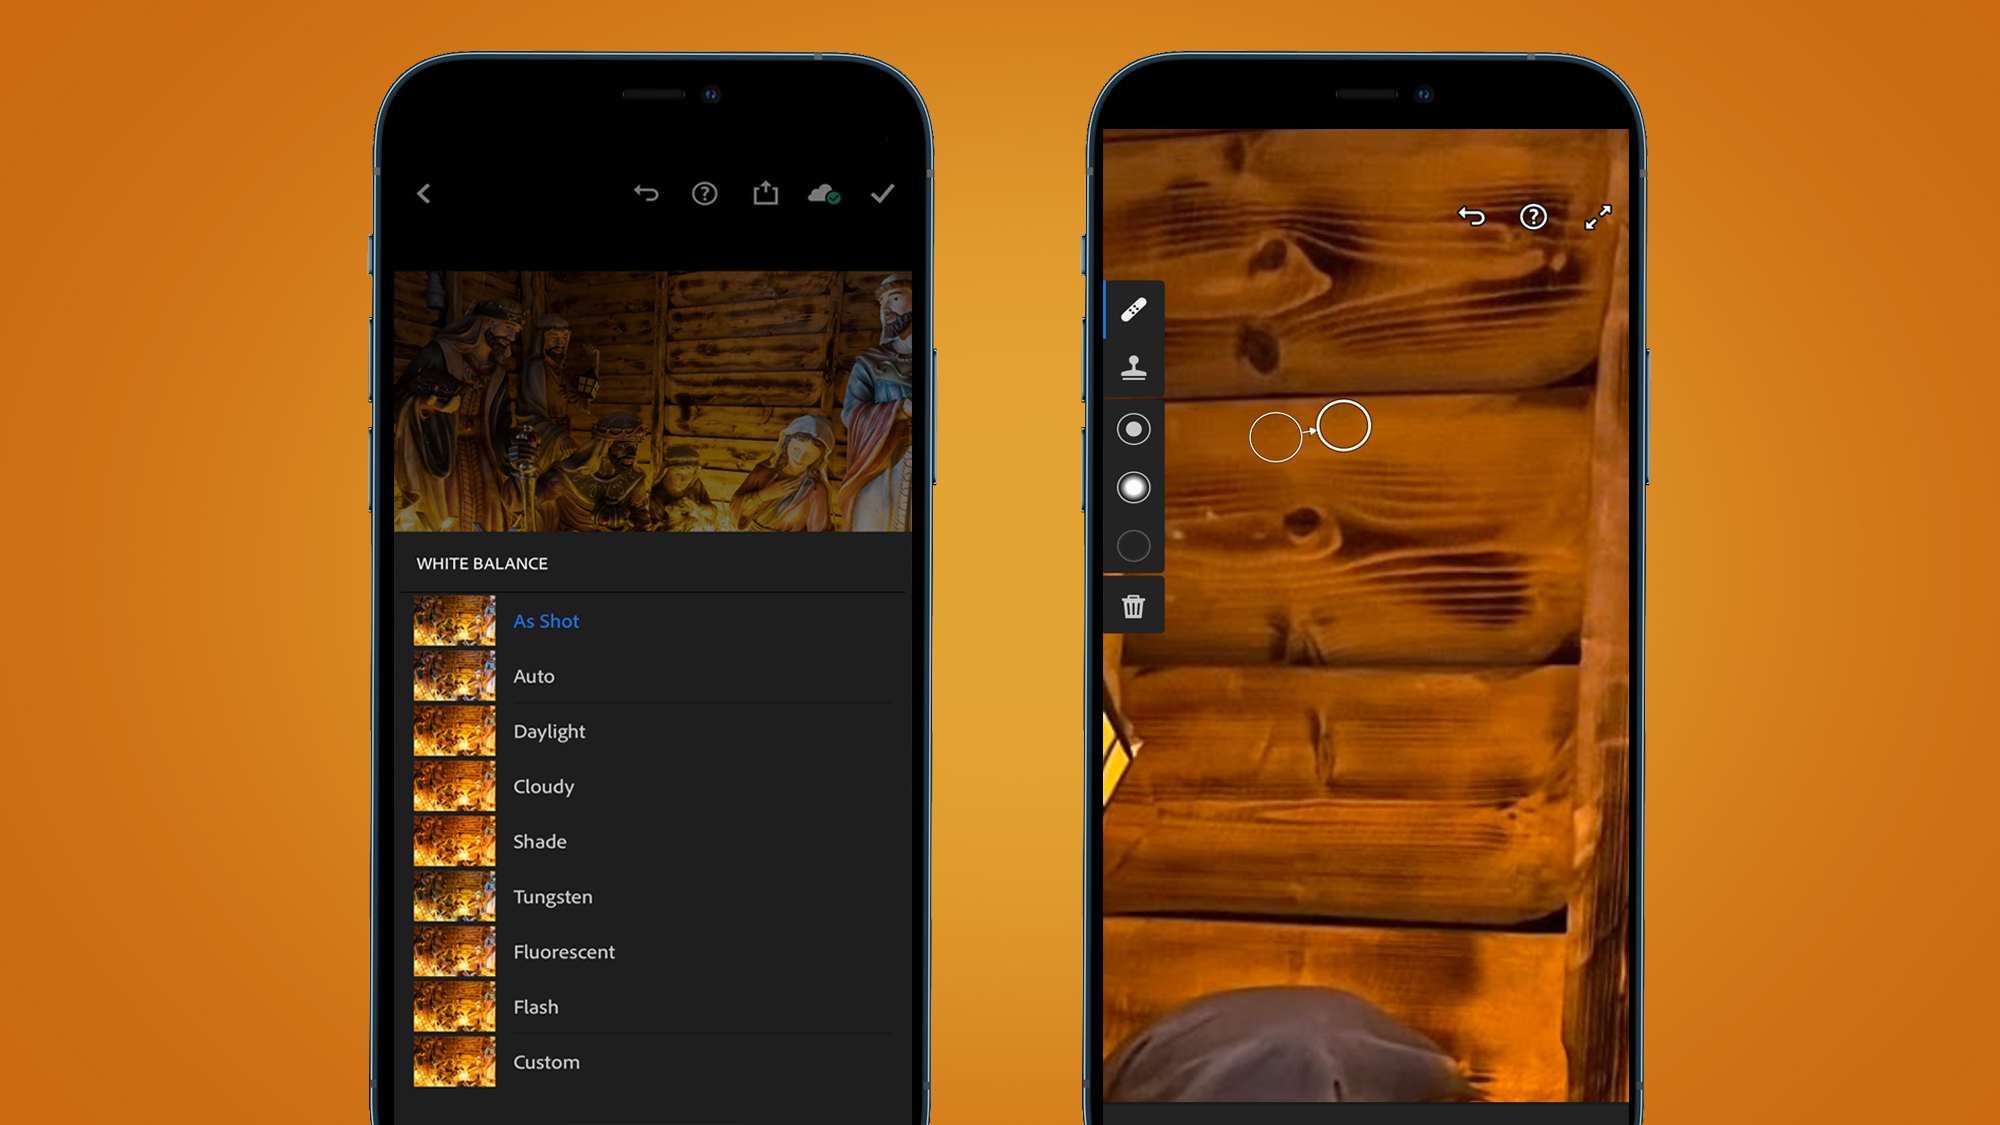
On your phone, Lightroom mobile gives you many of the same options as Apple's Photos app, including Brightness, Highlights, Shadows, Contrast and more. But it also offers extra tools for even finer edits, like the handy spot healing brush and presets.
In this scene, we just used the healing brush to fix some distracting imperfections and tweaked the white balance. Again, it’s worth experimenting with different sliders to learn how they all work, if you’re new to photo editing. Alternatively, if you have Photoshop or Lightroom on your computer, you can open your iPhone’s DNG files in Adobe Camera Raw and make similar edits there, too.
5. Finish and export
Once you’re happy with the edits you’ve made, it's time to export. If you're using the Photos app, tap Done. A good option might be to Add your photo into a special “edited” folder, so that you can quickly grab your shots when you need them.
Here we can see the differences between an edited raw file and a JPEG shot which came straight from the phone (shot a couple of seconds later).
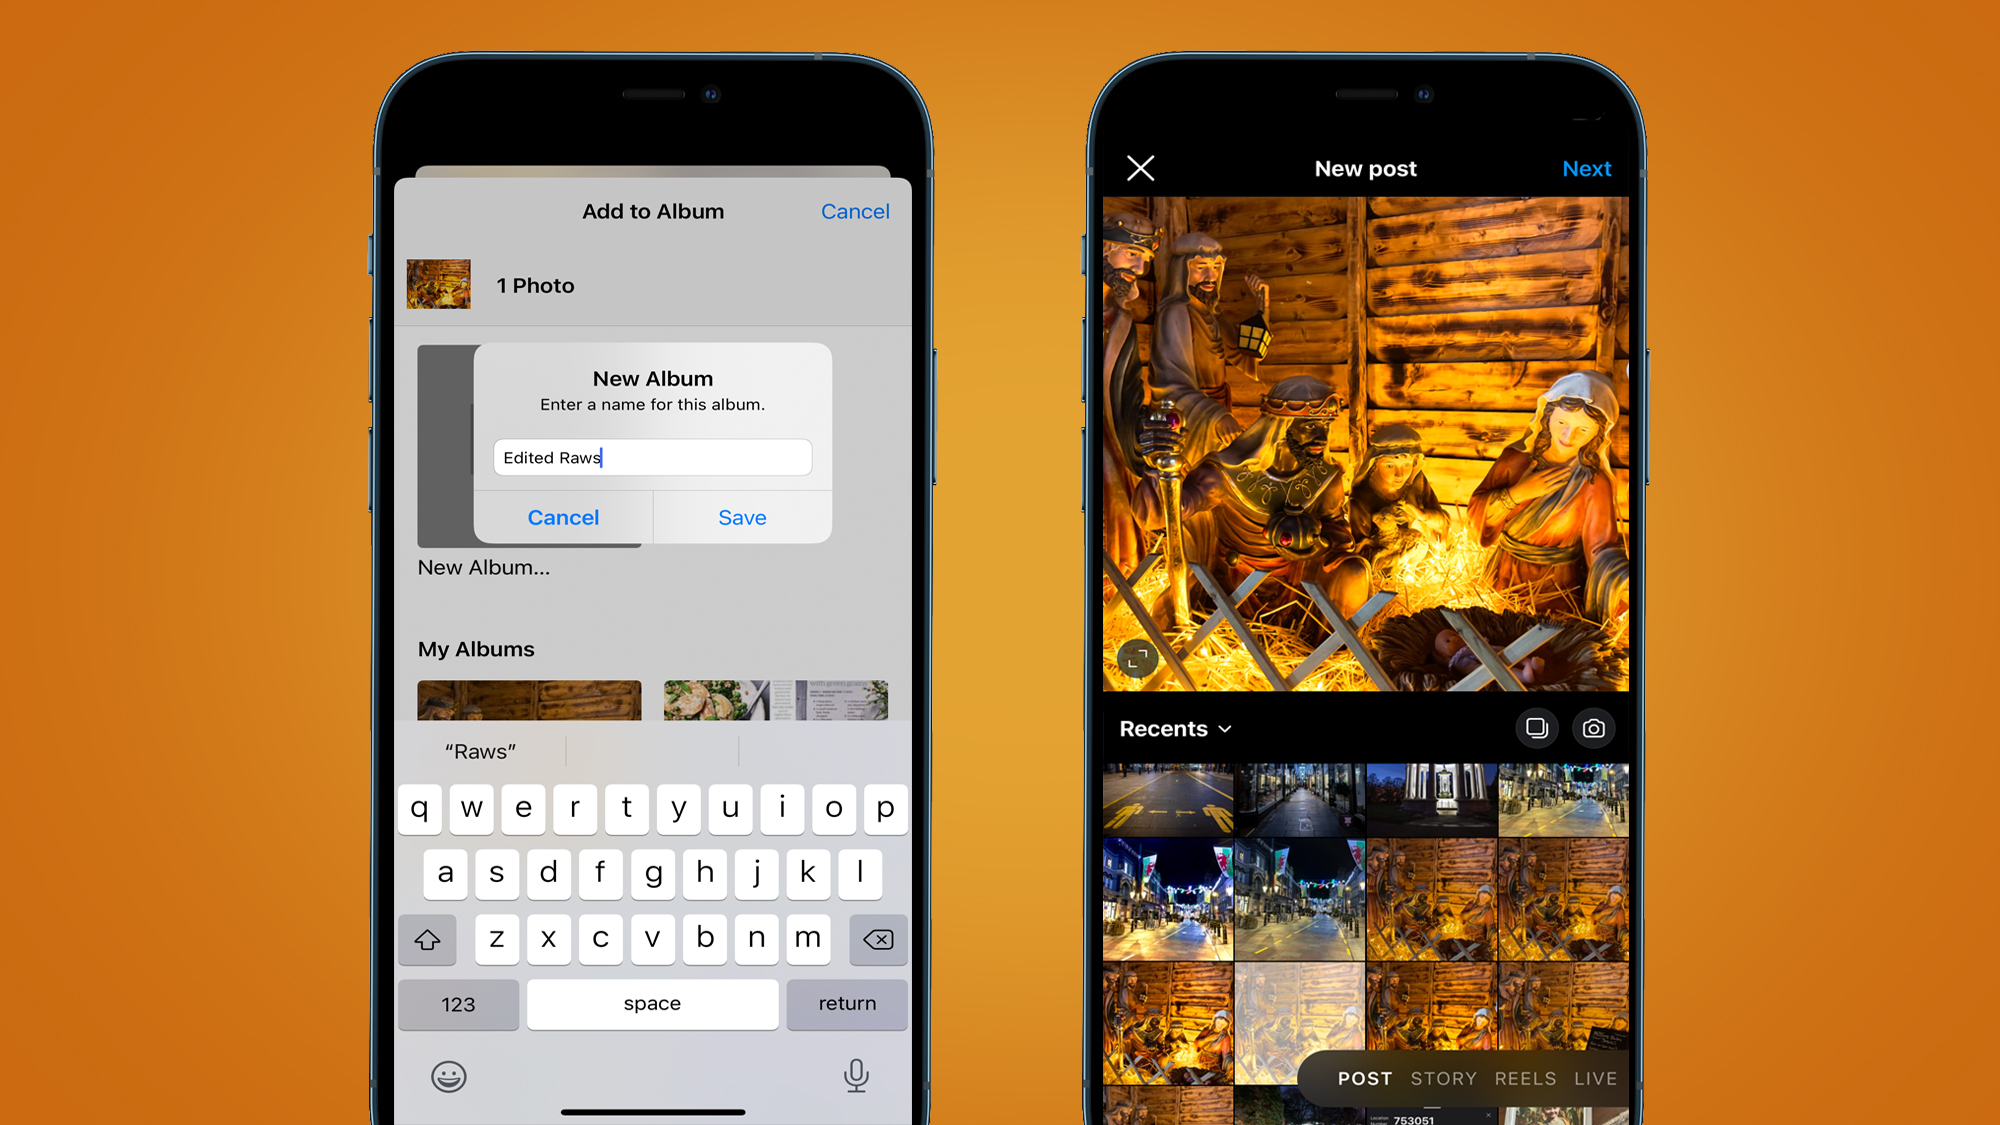
The differences aren’t huge or dramatic, but we can see that there’s some extra vibrance and subtle differences that make the edited shot pop that little bit more. There’s a little more brightness in the faces of the characters, while the colors have been adjusted to make them slightly more realistic.
Initially, Instagram refused to accept iPhone’s ProRAW files, but a recent update has changed all that. Either way, it’s better to make the edits in the Photos app before uploading to Instagram, which you can do directly from the Photos app, or head to the Instagram app itself to add extra filters and so on.
Apple ProRaw: the pros and cons
It was pretty big news when Apple announced it was finally bringing its own twist on raw shooting to the iPhone's native camera app. Considering it's been possible on Android phones for several years, it felt like something that Apple was lagging behind on (even if you could shoot raw in third-party apps).
Now it’s here, it’s well worth using – but arguably, quite sparingly. On the plus side, the extra leeway lets you correct any problems created by difficult shooting scenarios, like blown out skies, taking greater control than you would be able to with JPEG / HEIC images. It’s also great that you can make advanced edits in the native Photos app without too much additional knowledge.
However, photos directly from the camera are generally so good in the first place, it’s not always worth taking up the extra storage space and having to edit to export to social media platforms. We hope that this is the first step towards introducing a more advanced shooting mode for the iPhone’s native camera app – but for now, it'll do nicely.
- These are the best camera phones you can buy right now
from TechRadar - All the latest technology news https://ift.tt/2WYWcmN


No comments:
Post a Comment